Wednesday, April 13, 2011

Wasabi Crusted Nairagi with Mango Salsa and Coconut Rice

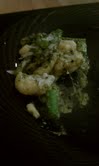
Nairagi is a Hawaiian fish that is very similar in texture to Big Eye Tuna. Central Market (at least in Austin carries it) and it is cheaper than big eye and yellow fin tuna (more expensive than albacore). Lately the price has been about two dollars higher than normal, luckily my fish monger likes to talk to me about food and gives me a fantastic discount whenever I go! Gotta love fish mongers! This dish is one half of what I made last night. I needed a recipe that I could use for both fish and beef and I wanted a twist on my classic fish dish (I seriously eat Ahi poke with coconut rice WAY too much), so I sort of said hey this sounds good and this sounds good and this sounds good. In truth, in making the nightly menus for the week I decided to just take components from three different meals and put them together. Had I had more time I would have loved to do a couple more things, which I plan to just include in my recipe. Additionally, the mango that I bought was deceptively un-ripe and the salsa, though it tasted great was a bit off texturally and looks less like salsa than I would like. This will be remedied soon when mangoes come into full season so it will be great if you try it over summer. Also, word of caution - I HATE cutting mangoes. It is one of those fruits that I just cannot figure out regardless of how many times i do it, see it, read about it - you get the picture - so I will not be telling you how to cut a mango.

Serves One

Fish
  • One four oz Nairagi steak (can sub tuna if you wish)
  • One tsp Wasabi powder
  • Half Cup of crushed Wasabi Peas
  • One tablespoon Sesame Seeds
  • Salt 
  • Pepper
  • Olive Oil for coating
Combine salt, pepper, Wasabi powder and crushed wasabi peas, and sesame seeds on a plate - mix well. Dip the fish in olive oil on both sides then coat each side with the wasabi mixture. Bring olive oil or canola oil to temperature over medium heat, place fish in pan and sear for about 45 seconds on each side. Remove and reserve.

Coconut Rice
  • One cup Coconut Milk
  • Two Tablespoons Ginger People Minced Ginger
  • One tsp salt
  • Half cup of Basmati Rice
Bring milk, ginger and salt to a boil in a small saucepan. Add rice, cover, reduce to simmer. Cook for ten minutes and fluff.

Mango Salsa
  • One Mango, diced
  • One half a red onion or one large shallot, fine dice
  • 2 garlic cloves, made into a loose paste
  • 1/3 cup minced green onions
  • 1/2 large avocado, diced
  • 1/2 cup chopped cilantro
  • Cayenne Pepper to taste
  • Squeeze of lime juice, about half a lime
  • Salt and Pepper to Taste
  • One Jalapeno, seeded and finely diced
  • A few tablespoons of fresh basil or mint (optional) 
  • 2 tablespoons Ginger, minced
Combine all ingredients in a bowl and mix well (but gently) keep in fridge until ready to use.

Fried Shallots (had I had time I wanted to make this, you can also use pre-made ones that you can buy in Asian markets)
  • One shallot, thinly sliced
  • Canola Oil (can use olive oil but Canola or Safflower oil will be best for frying) 
  • A small handful of flour
  • Salt


Heat oil in a skillet (about a cm worth of oil) to 325 degrees. Toss Shallots with flour then put into the hot oil. Fry until a LIGHT golden brown (anywhere from 2 minutes to 12 minutes depending on heat and depth of oil and amount of shallots being fried) and remove to a napkin lined drying rack or plate. Sprinkle with a bit of salt.

Dish Assembly
Place a small mound of rice in the center of a plate (can be done in free form, with a molding ring, or with an upside down measuring cup. Place the fish on top of the rice once it has finished searing. Drizzle fish with eel sauce then top with the Mango Salsa. Top the Salsa with Fried Shallots and serve (fish can also be sliced before serving if desired - this is recommended if you do not have sushi knives or smaller sharp knives).

Thursday, April 7, 2011

Chicken and Dumplings

Night after night of nostalgic food sure is fun! Chicken and Dumplings is another childhood favorite. One of those - I like the one that my momma makes the best and cannot ever stray to far away from it or I will not like it - meals. Everyone has their favorite version and I swear I am not knocking them, but if you put a soup with some dumplings and a bunch of carrots in front of me and call it chicken and dumplings I will make a huge scene about how it is an imposter!!!  (unless the plate is placed in front of me by Thomas Keller or Wylie Dufresne...I will eat anything they place in front of me without a thought in my head except maybe amazement, wonder, and happiness). Proper Chicken and Dumplings. I tried for years (before I actually knew how to cook) to make this like my momma and never could so, brimming with disappointment,  I put the idea , along with the heart-healthy Bisquick, on the shelf for a while. Then I learned how to cook and decided to try again one night. Much better results but,  still not like momma made it - it was sweeter almost. For comparison sake, soon thereafter I asked my mom to make it for me. I knew almost instantly what the problem was. Verdict: throw out your "healthy" Bisquick and use the regular stuff! Makes all the difference. Now I make them exactly the way I love them (albeit a bit different from my momma's but there is a very strong resemblance) and there is no low-fat Bisquick involved. If you think about it saying a processed food is more "healthy" than some other processed food is - well - absurd...it is all bad for you so eat it sporadically and, when you do, get the good stuff.

  • One Box plus 1/2 cup of Good Quality Chicken Stock
  • 2 Bay leaves
  • Salt and Pepper to taste
  • 1.5 - 2 chicken breasts (seasoned with salt, pepper, cayenne, and herbs de provence)
  • 3.5 cups Bisquick mixed with enough water to bind
  • 3 celery stalks, sliced a little under a quarter inch thick
  • 2-3 garlic cloves, finely minced
  • one large shallot, chopped 
  • splash of white wine
  • 2 tablespoons olive oil
In a mixing bowl, mix Bisquick and water until you have a thick dough. Reserve.

Heat 1.5 tablespoons oil in a skillet. Season chicken and place in hot oil, brown on each side. Remove from pan and reduce heat so as not to burn the mirepoix. Add garlic, shallots, celery and bay leaves (with a pinch of salt) to the pan and scrape bottom well to coat with chicken bits leftover. After a few minutes, hit the mixture with a splash of white wine and allow to cook off. Pour in all of the chicken broth and bring to a boil. Gently drop dumpling mixture into the liquid a spoonful at a time until it is all gone. Add salt and pepper and stir once. Reduce heat and simmer, uncovered for 20 minutes. Stir again and cover. Continue simmering for another 20 minutes. At some point during the simmer time, slice chicken into thin slices, then cut in half and reserve. About five minutes before the dumplings are ready, add sliced chicken, salt as needed and pepper and stir. Five minutes later and you are done. Good luck not eating the whole pan.

Wednesday, April 6, 2011

Chicken and Rice

I am willing to bet that "Chicken and Rice" will be the most simple dish you see in this blog. For as long as I can remember, whenever I was sick, my momma would make this for me. In fact, there is not really any chicken (any real chicken) in the dish. I made it last night to ease my upset stomach and just thought I would share in case anyone has the flu, some rice, and cream of chicken soup.

  • One can Campbell's Cream of Chicken Soup
  • One can milk or water (I use water most of the time)
  • One can white rice (as in I put the rice into the can and that is how I measure it)
  • Salt to taste
  • Pepper to taste
Bring the soup and the water to a boil and add rice and a pinch of salt, stir, reduce heat to a simmer and cover. Allow to cook for 15-20 minutes (or however long your particular rice takes to cook). Salt and pepper to desired taste. Get back in bed and eat it curled up in a ball.

*I have to have this "sick food" in my "sick bowl" - a blue and white bowl I have had since before I could walk. It just is not the same without it.

Tuesday, April 5, 2011

Tomato, Artichoke, and Zucchini Casserole

I am thrilled that I created this. D wanted baked tomatoes because he loves them. I did not want to buy two types of tomatoes (I was buying cherry tomatoes for a dish later in the week) so I decided to bake tomatoes but inside a casserole dish. The result of my creation was a man friend who did not say a word throughout dinner, licked his plate, and got seconds. These actions were all precursors to a rave review. This is a super easy, super fresh, super healthy, super delicious, super versatile, and perfect for summer or winter (adjust veggies accordingly).Final verdict: Keeper!

Tomato, Artichoke and Zucchini Casserole
Serves 4
  • 3/4 of a pint of Cherry or Grape tomatoes, halved and seeded 
  • One zucchini, cut into half moons 
  • One can artichoke hearts, quartered
  • 1-2 large shallots
  • 3-5 cloves garlic 
  • Salt 
  • Pepper
  • 3 tablespoons chicken broth
  • 1/4 cup white wine
  • 1 tsp dried thyme
  • handful torn basil
  • a few dots of goat cheese or some shredded Fontina
  • a few pieces of torn prosciutto or pancetta (optional)
  • Bread crumbs (optional - I actually do not think they added anything)
Grease a baking dish. Preheat oven to 400. In a skillet, heat olive oil and add prosciutto or pancetta (if using) and allow to render. Remove from plan and garlic and shallots (properly seasoned) and saute until glassy. Add white wine and chicken broth and reduce a bit to just cook off the alcohol.Add some pepper and the thyme and reserve.While the shallot mixture is cooking, seed tomatoes, cut zucchini and artichoke and combine in the baking dish. Sprinkle with salt and pepper and mix with cheese. Once the shallot mixture is done, pour mixture into the baking dish. Top with breadcrumbs and bake for 15-20 minutes. You can pull out halfway through and top with more cheese (or you can just move the previous addition of cheese to now if using less cheese). Pull out of the oven and spoon into small bowl or onto a plate.

This would be delightful with a piece of toasted garlic ciabatta bread. It would also be delightful with some chicken sausage for a one-pot meal (can you call it a one-pot meal if you also use a pan - in Andiland you can!).

Ricotta Gnocchi with Aspargus and Creamy Pesto

I have been wanting to make gnocchi for a long time now, so yesterday I gave D his dinner choices - lucky for me he went with gnocchi. I had three potatoes that were leftover from the previous week and needed to use them so I figured - why not try! Luckily I had also bought Ricotta at Whole Foods as a back up in the event the potatoes were not giving the gnocchi the proper texture (freshness, size, type of potato all affects gnocchi texture and I did not want them to be too dense). Glad I had my back up, because come to find out that the potatoes had gone all sorts of bad. Into the trash they went and out came the Ricotta. I really had so much fun making this dish (and the mess that was a side product) and it turned out wonderfully the very first time! Ironically enough, we had just had gnocchi at Sullivan's - mine was better (we both agreed). It probably could have been a little more light and airy but overall, for the first time, it was light and not rubbery at all. D got seconds of BOTH dishes I served last night - which does not usually happen - so I guess he really, really liked it?

Ricotta Gnocchi
Serves 6 (small portions) or serves 2-3 and leaves half recipe for freezing

  • One 16 Ounce Container of Ricotta (I used Part Skim, feel free to use whole)
  • 1/2 cup flour ( you will likely need more but start with this and add a tablespoon at a time - the idea is to use as little as possible)
  • 1/2 tbsp salt
  • One egg
  • One cup finely grated Parmesan, Pecorino, or Grana Padano
Dough Making
Line a strainer with a cheese cloth. Add the ricotta and let the cheese drain for about an hour. (This can be done several days in advance - this only really needs to be done if you have a particularly watery ricotta - I only needed about five minutes because my ricotta was more firm and I wanted to eat before 10 pm!). In a large bowl, mix the strained ricotta, egg, cheese, and 1/2 cup of the flour until all ingredients are incorporated. Cover and refrigerate for 15 minutes. Check the dough by rolling a bit in your hand. If it clings to your fingers, incorporate more flour one tablespoon at a time until you reach a tacky, workable consistency. Refrigerate for another 15 minutes. On the stove, bring water to a boil (salted).

Shaping 
Shaping can be done one of two ways depending on your tools and your preference. Sprinkle a baking sheet with flour and set it close to your work space. Sprinkle your hands and work surface with a little flour.

1) Put dough into a disposable piping bag with 5/8th inch tip (or whatever size that you have or prefer). Pipe out half inch pieces of dough and cut at the top with a sharp knife. To make grooved gnocchi, roll the "Pillow" against the back of a fork with your thumb. Place on a floured surface until all gnocchi are formed.

2) Break off a tennis-ball sized piece of the dough and roll it into a thick log about 3/4-inch thick. Cut the log into 3/4" pieces. Shape them by rolling the "pillows" off the back of a fork with your thumb.
Transfer this batch to the baking sheet and toss with flour to prevent sticking. Repeat rolling process with the remaining dough.

Cooking
Bring salted water to a rolling boil. Gently drop the gnocchi into the boiling water - they will sink to the bottom. Once they bob to the surface, they are cooked. Remove gnocchi with a slotted spoon and transfer to a colander set over a bowl to finish draining. Repeat with second batch of gnocchi. Toss the gnocchi with sauce and serve immediately.

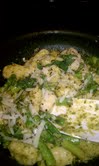
The Whole Dish - The Sauce from last night was a creamy pesto because I had leftover basil pesto and it is well...divine.
  • 3 cups Ricotta Gnocchi
  • 3/4 pound Fresh asparagus, steamed to slightly undercooked and cut into one inch pieces
  • Handful of Shaved Parmesan Cheese
  • Handful of torn basil (optional)
  • 1/3 cup Basil Pesto (more to taste or quantity available)
  • 2-3 tbsp cream, whole milk or half and half
  • Fresh ground black pepper to taste 
In a large skillet, combine cream, pesto, asparagus, and fresh pepper (if you have minced garlic or shallot you need to use throw it in but it is not necessary) and bring to a simmer for about 5 minutes. Gently toss the gnocchi with the sauce, coating well. Remove from heart. Garnish with Cheese, basil, and pepper to taste and serve immediately. 


* You can freeze leftover gnocchi for up to a month. Frozen gnocchi can be dropped directly into boiling water for an easy weeknight meal.
**There are so many variations for this dish that I cannot list them. I plan on making different types of gnocchi and experimenting with different sauces and veggies! Will post those as I make them.

Monday, March 28, 2011

Bruschetta

Bruschetta makes me so wonderfully happy! It is one of those super simple meals that great ingredients just make amazing. I love making a big batch of this to use as appetizers, chicken toppers, pasta mix-ins and a healthy snack with pita chips. It is awesome for lake weekends and large groups. I like it cold and warmed up - will provide both methods below.

Cold Bruschetta
  • 1.5 pounds ripe, plum tomatoes - drained, seeded, chopped *some people remove skins - I skip this step
  • 4-7 garlic cloves, minced
  • 2 cups julienned basil
  • .5 - 1 tbsp good quality balsamic vinaigrette to taste
  • Salt to taste
  • Freshly ground black pepper
  • A small dash of Gerrard's Champagne Light Dressing *optional
  • One french baguette or ciabatta loaf (I prefer ciabatta but the baguette is much easier to make appetizer portions with 
  • High quality olive oil
In a large bowl combine all ingredients and mix well, adjusting amounts to taste. Set aside.

Slice bread into slices (between a centimeter and half inch thick depending on preference), brush with olive oil and place on a greased baking dish. Bake on 450 for 5 minutes (longer if more doneness is desired, shorter if using smaller slices than half-inch). Remove and top with tomato mixture. Serve immediately.

Warm Bruschetta
  • All the same ingredients, plus Fresh Mozzarella or Burrata, diced
In a large bowl combine all ingredients, plus mozzarella, and mix well, adjusting amounts to taste. Set aside.

Slice bread into slices (half inch thick depending on preference), brush with olive oil and place on a greased baking dish. Bake on 450 for 3 minutes. Remove, top with the tomato mixture and return to the oven for 3-4 minutes - until cheese is melty. Serve immediately.

Pesto Chicken Salad Panini

This mayo-free chicken salad is absolutely incredible and SO easy. This was a concoction I made up one day with leftover rotisserie chicken, leftover pesto that I needed to use and cranberries (I always have cranberries on hand) when I wanted a sandwich. Since then, I have made this many times as a sandwich filler, spinach salad toppers, and spinach pasta dish. It is so good and has frequently made the menu for bachelorette and Christmas parties and other events that require feeding a large group. Here is the version of a panni that I made - not going to lie, it was one of the best sandwhiches I have ever had in my life.
  • 1 cup leftover chicken, shredded
  • 1.5 tbsps of basil pesto
  • freshly cracked pepper to taste
  • handful of dehydrated cranberries
  • small handful arugula (or spinach if you have no arugula)
  • 1 tbsp chipotle aioli *optional
  • 1-2 ounces of cheese (I used Fontina but you can use whatever you have on hand)
  • 2 slices of ciabatta bread, one side each oiled and rubbed with a garlic clove
Special equipment
  • Panini Maker
Turn the panini maker on so that it is heating. In a small bowl, combine chicken, pesto, cheese, pepper and cranberries and mix well. Garlic and Oil the outside of each piece of bread, spread aioli on the inside of the bread. Layer arugula, chicken salad mixture on the bread then place in the panini maker. Grill until golden brown, remove, cut in half and serve.

*When not making a panini leave the cheese out and add chicken mix to salads, pasta, eat as a dip with pita chips etc.