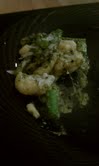
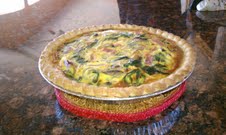
Showing posts with label Vegetarian. Show all posts

Monday, May 9, 2011

Black Bean - Mango Salsa

When mangoes are in season, I love to mix them with avocado and such things to top dishes off or as a healthy dip. This is interesting as I do not typically eat mangoes on their own - they are just a tad too sweet for me. But when mixed with other elements, the sweetness is decreased and I enjoy them immensely! This salsa is very versatile and cost effective. It can be used in tacos, on grilled or sauteed fish, on baked chicken as a dip or a salad topper. 
  • One can Black Beans 
  • Two Mangoes, diced
  • Half red onion, small dice
  • One cup cilantro, chopped
  • One avocado, diced
  • One Jalapeno, minced
  • 1.5 cups Jicama, diced 
  • Juice from one lime, mixed with pinch of salt and a little bit of olive oil (or garlic olive oil)
  • Cayenne, Garlic Powder, Cumin, and Adobo spices as desired

Combine all ingredients in a bowl and mix well (but gently). Season as desired.

Friday, May 6, 2011

No-Butter Garlic Bread

I am aware that most people know how to make garlic bread. I am also aware that this is a fairly boring version of garlic bread. However, mixing garlic with cheese is not "garlic bread," it is cheesy garlic bread (and it is fabulous). There are loads of variations for this, but this particular garlic bread is incredible when floated into  soups or brothy dishes because it is toasted longer than normal and individually sliced instead of toasted as a loaf. It is also fanstastic when thrown into a food processor and made into homemade bread crumbs - I promise that you will not get the same crunch from the canned kind. This version is also healthier than the garlic bread that most people typically think about - it is not dripping with butter (not that things dripping with butter are in any way appetite supressing, they just simply add too much jiggle to my thighs) and it still has a great deal of flavor. That said, man do I love cheesy garlic bread...Advice for cutting your bread if you do not elect to have your baker do it for you - use a serrated knife. You will make your life easier.
  • Half loaf of Ciabatta bread (or similar), sliced
  • Five cloves garlic, finely mined
  • Favorite Oil (I use garlic or basil oil usually), put into a small container
  • Small handful of fresh parsley, chopped
  • Paprika
  • Cayenne (optional)
  • Fresh Black Pepper, to taste
Brush each side of the bread with a bit of oil, place on a baking rack or tray that has holes or slats. Sprinkly each peice of bread with Cayenne, Paprika, and Pepper. Top with an ample amount of garlic and parsely. Bake for about five to seven minutes at 375. Serve with Soup or baked tomatoes or turn into homemade bread crumbs.

Balls of Joy aka Oreo Cake Balls

For those of you who roll your eyes when I talk about the importance of organic food and aversion of processed food - eat your heart out (though I have to admit, I will not be eating these - they are presents). I first had little Balls of Joy over the weekend at a shower (see previous baked tomatoes post). Not being a sweets person, I really intended to just try a bite and see what it was (I mean even if you aren't a sweets person, when you see something dipped in white chocolate your brain says EAT). I had two. They were so good. Soooooooo good. So good that I decided they would make lovely mother's day treats for our wonderful Mommas! So it was decided, I was going to make sweets. I honestly do not remember the last time I made dessert or sweets of any kind. I know what it was (a chocolate and amaretto pear torte with orange infused whipped cream), but that had to be at least three years ago - and I did not eat it (though I was told it was very good). I was shocked to find that there are more than ample recipe ideas for these little guys online. So I read one, got the basic method down and planned to make little Balls of Joy. Enter Cinco de Mayo and skinny-girl Margaritas and I start this process at about 7:30, thinking it won't really be that messy or take that long. It wasn't any more messy and did not take any longer than I usually take to do things - take that for whatever it is worth. D also helped out, something I rarely allow him to do (not because I don't want him to just because I micromanage and tend to take over). We learned an important lesson last night - that is do not put too many balls in the warm chocolate - they will melt and look funny. This is for aesthetic purposes only - they still taste great, I am told, they just look a little sad. Now that I have the basics of this down, I cannot wait to make more and add my own little twists to them. I am willing to bet that these would be awesome with mint oreos, with little bit of cherry mixed into the Mud, or with some crushed nut sprinkled over the top. Oh the world of experimentation=) 

Balls of Joy - Pre Bath

Balls of Joy
  • One package Oreos
  • One 8 ounce package of cream cheese, at room temperature
  • 3-4 Ghirardelli White Chocolate Baking Bars
  • 3-4 Cadburry Milk Chocolate Bars
Special Equipment
  • Toothpicks
  • Double Broiler
  • Mud
  • Wax Paper or Aluminum Foil

Put the Oreos into a food processor and process until finely ground. In batches (if you have a smaller food processor which I do) add  Oreo and cream cheese, blending until a big, giant, black, creamy substance. Repeat as necessary until smooth and all cheese and cookie has been incorporated. Pick up small handfuls of the black mound (which will be called Mud from now on) and roll into small balls with your hands. Place on a cookie sheet lined with Wax Paper or aluminum foil. Once all Mud is rolled into little balls of Joy, put cookie sheet into the fridge or freezer and chill for an hour or so. About ten minutes before you need to pull the Mud balls out, prepare a double boiler (if you do not have one, or in my case cannot reach yours feel free to place a oven proof bowl over a pan with water) and over a low heat begin to melt the chocolate - adding small handfuls one at a time until melted. If you have two double boilers, or the ability to create two double boilers, then feel free to heat milk chocolate in one and white chocolate in the other and decreased your time frame to finish. Once chocolate is melted, place one ball into the chocolate and roll gently with a spatula to coat well with chocolate. Remove quickly  with a toothpick so as to prevent melting and ball disfiguration (oh the horror). Return to wax paper and allow chocolate to cool. After about fifteen minutes drizzle chocolate of the opposite color over the balls and return to the fridge.

Tuesday, April 26, 2011

Green Bean Casserole

Who doesn't love Green Bean Casserole? I have been (not-so-secretly) pining to do a dinner consisting of ham, green bean casserole, scalloped potatoes and other veggies. I was partially satiated over Easter weekend. We spent a great weekend with D's family and there were two HUGE hams....D literally ALWAYS wants scalloped potatoes, so I decided to make those and my green bean casserole. I was happy as a clam. Incidentally, I do not think that I have ever had green bean casserole made with canned beans. I always use fresh. Additionally, I usually make my own cream of mushroom soup when I have the time so that I do not have to fill my body (and the bodies of everyone eating) with all the bad things in the processed kind, but this version will be featuring partially processed food. In fact, this sauce is a hybrid of  "made from scratch" and processed - I was trying to use up some cream that was set to expire the next weekend and did not want to buy more because I was shopping at HEB versus my usual stores. Ergo, I did not have quite enough of the ingredients I needed to make the sauce entirely from scratch. Also, I usually fry my own shallots as toppers to my casserole but used the canned french-fried onions in this version. As I was a guest in someone's house and had already made a good mess (and they had company) so I just wanted to save time and the mess and go the easy, processed route. My apologies to the health nuts and you are welcome to those in a time crunch.
  • 4 Cups fresh green beans, sliced into one inch pieces (and washed)
  • 2 cups fresh mushrooms, halved
  • 5 large shallots, thinly sliced
  • 6 cloves garlic, minced
  • 1 cup cream
  • 4 TBSP butter
  • Red Pepper flakes, to taste
  • Salt, to taste
  • Pepper, to taste
  • 1/2 can of Cream of Mushroom Soup
  • Handful of French Fried Onions or Fried Shallots
  • Chicken Broth 
Boil Green Beans in Chicken Broth (or water with chicken bouillon) until slightly underdone (about 8 minutes) and then transfer immediately to an ice bath. Reserve some of the chicken broth.


In a pan, saute the shallots, garlic, red pepper, and mushrooms in the butter (salt and pepper to season). Add a splash of white wine, cream and mushroom soup and allow to reduce (add pepper and other seasoning to taste). Once the texture is as you like it (I like mine in a semi-tick sauce - combine with green beans and top with fried onions. Bake uncovered for 30 minutes.

Saturday, April 23, 2011

Hatch Green Chile Mac and Cheese

So this might take me a while to get to the recipe as there are about five stories that go into this dish. First, we had dinner at a friends house last weekend and the fare was fajitas. I was going to bring black bean corn salsa and brilliantly garlicky guac (guac turned into pico but that is another story) and then make rice cooked in Hatch Green Chili enchilada sauce (it just sounded so good). But I failed to specify the ingredients I needed to the person buying them, ergo no sauce. The next night we went to my parent's house and I walked into my bedroom and there was a can of the missing ingredient sitting on the dresser. I laughed and texted my Ervetta (the person doing the shopping the day before) who happened to be in the ER with an extremely broken toe. Needless to say - she did not care much. But I was excited because now I get to make the dish I had envisioned. Fast forward to this weekend, we are heading out to the lake to have Easter with D's family. D says that I can figure out what I am making in the car and we can stop at the HEB in Marble Falls. This complicates things for me because I am not sure what staples I need to bring, so I pack two grocery bags (yes I pack food to take with me in case the store doesn't have it) and see the sauce and say - why not? IN goes the sauce, out goes D, Foster Brown, and I on the road. His brother was making flank steak so I started turning the wheels and gave D his options - knowing which one would get picked (the options were roasted mashed sweet potatoes, green beans and hatch green chili mac and cheese - no brainer). We decide on mac and cheese (shocker I know), hit the grocery and relax at the lake for a while before I start cooking. As it turns out, this was the best choice for a side because it ended up being the only thing we ate for dinner. =)

Hatch Green Chile Mac and Cheese

  • One pound pasta of choice (something tubular or shell shaped works best)
  • One can Hatch Green Chile Enchilada Sauce
  • 2 Hatch Green Chilis, roasted and skins removed (since these are not in season most of the year in Texas sub Jalapeno, Serrano, or Poblano)
  • One Tomatillo, hush removed and boiled or roasted)
  • 1 cup Sharp Cheddar, shredded (aged about 2 years for best melting results)
  • 1.5 cups Queso Asadero, shredded
  • 1 cup Jalapeno Jack Cheese, shredded
  • 2 Large Shallots, sliced and diced
  • 3-4 large handfuls of Spinach
  • 1 half lime, juiced
  • 1 cup cream or whole milk (I used less for health reasons but the sauce did not come out quite as creamy as I liked - but I also did not put it in the blender which I will tell you to do later)
  • 3 tbsp butter
  • 6 large cloves garlic, minced
  • One pint of Cherry tomatoes, seeded and roughly chopped
  • Pinch salt
  • Good amount of black pepper
  • Chicken Broth
  • 2-3 heaping tablespoons of Wheat Flour
  • Sriracha (optional)
  • Parmesan, shredded or grated (optional) 
Cook pasta in salted water according to instructions.

Saute (seasoned) garlic, shallots, and flour with butter - stirring well to make a light roux. Add roasted peppers and continue to saute. To the pan, add the Hatch Green Chile Enchilada Sauce, Cream, remaining butter, and chicken broth - stir well and reduce slightly. After the tomatillo has been boiled it should be soft, coarsely chop it and add it to the pan. Continue simmering. Remove from heat and put the sauce into a food processor and puree until smooth (this step is optional - if you do not mind chunk then by all means skip - I did). Return the sauce to the hot pan and add in a small handful of cheese (this needs to be done in batches) and stir until melted. Repeat this step until cheese is gone and sauce is thick and gooey. Add lime juice, salt, and pepper to taste. Combine the pasta, tomatoes, spinach, and sauce in a greased oven-safe dish. Stir well. Top with bread crumbs and parmesan cheese if using (feel free to butter your bread crumbs to get them extra brown and delicious - I usually skip this step out of deference to my remarkably expanding derrière). Drizzle the topping with Sriracha (make a pretty design). Bake, uncovered, in an oven that has been pre-heated to 375. Bake until the top is golden brown and the sides are bubbling up. About 45 minutes.

Variation: I think this would be splendid with the addition of a small amount of leftover pulled pork, chicken or ham for a one pot meal. I also think that fresh cilantro would be excellent in this and brighten the dish well if you have it.

Tuesday, April 5, 2011

Tomato, Artichoke, and Zucchini Casserole

I am thrilled that I created this. D wanted baked tomatoes because he loves them. I did not want to buy two types of tomatoes (I was buying cherry tomatoes for a dish later in the week) so I decided to bake tomatoes but inside a casserole dish. The result of my creation was a man friend who did not say a word throughout dinner, licked his plate, and got seconds. These actions were all precursors to a rave review. This is a super easy, super fresh, super healthy, super delicious, super versatile, and perfect for summer or winter (adjust veggies accordingly).Final verdict: Keeper!

Tomato, Artichoke and Zucchini Casserole
Serves 4
  • 3/4 of a pint of Cherry or Grape tomatoes, halved and seeded 
  • One zucchini, cut into half moons 
  • One can artichoke hearts, quartered
  • 1-2 large shallots
  • 3-5 cloves garlic 
  • Salt 
  • Pepper
  • 3 tablespoons chicken broth
  • 1/4 cup white wine
  • 1 tsp dried thyme
  • handful torn basil
  • a few dots of goat cheese or some shredded Fontina
  • a few pieces of torn prosciutto or pancetta (optional)
  • Bread crumbs (optional - I actually do not think they added anything)
Grease a baking dish. Preheat oven to 400. In a skillet, heat olive oil and add prosciutto or pancetta (if using) and allow to render. Remove from plan and garlic and shallots (properly seasoned) and saute until glassy. Add white wine and chicken broth and reduce a bit to just cook off the alcohol.Add some pepper and the thyme and reserve.While the shallot mixture is cooking, seed tomatoes, cut zucchini and artichoke and combine in the baking dish. Sprinkle with salt and pepper and mix with cheese. Once the shallot mixture is done, pour mixture into the baking dish. Top with breadcrumbs and bake for 15-20 minutes. You can pull out halfway through and top with more cheese (or you can just move the previous addition of cheese to now if using less cheese). Pull out of the oven and spoon into small bowl or onto a plate.

This would be delightful with a piece of toasted garlic ciabatta bread. It would also be delightful with some chicken sausage for a one-pot meal (can you call it a one-pot meal if you also use a pan - in Andiland you can!).

Ricotta Gnocchi with Aspargus and Creamy Pesto

I have been wanting to make gnocchi for a long time now, so yesterday I gave D his dinner choices - lucky for me he went with gnocchi. I had three potatoes that were leftover from the previous week and needed to use them so I figured - why not try! Luckily I had also bought Ricotta at Whole Foods as a back up in the event the potatoes were not giving the gnocchi the proper texture (freshness, size, type of potato all affects gnocchi texture and I did not want them to be too dense). Glad I had my back up, because come to find out that the potatoes had gone all sorts of bad. Into the trash they went and out came the Ricotta. I really had so much fun making this dish (and the mess that was a side product) and it turned out wonderfully the very first time! Ironically enough, we had just had gnocchi at Sullivan's - mine was better (we both agreed). It probably could have been a little more light and airy but overall, for the first time, it was light and not rubbery at all. D got seconds of BOTH dishes I served last night - which does not usually happen - so I guess he really, really liked it?

Ricotta Gnocchi
Serves 6 (small portions) or serves 2-3 and leaves half recipe for freezing

  • One 16 Ounce Container of Ricotta (I used Part Skim, feel free to use whole)
  • 1/2 cup flour ( you will likely need more but start with this and add a tablespoon at a time - the idea is to use as little as possible)
  • 1/2 tbsp salt
  • One egg
  • One cup finely grated Parmesan, Pecorino, or Grana Padano
Dough Making
Line a strainer with a cheese cloth. Add the ricotta and let the cheese drain for about an hour. (This can be done several days in advance - this only really needs to be done if you have a particularly watery ricotta - I only needed about five minutes because my ricotta was more firm and I wanted to eat before 10 pm!). In a large bowl, mix the strained ricotta, egg, cheese, and 1/2 cup of the flour until all ingredients are incorporated. Cover and refrigerate for 15 minutes. Check the dough by rolling a bit in your hand. If it clings to your fingers, incorporate more flour one tablespoon at a time until you reach a tacky, workable consistency. Refrigerate for another 15 minutes. On the stove, bring water to a boil (salted).

Shaping 
Shaping can be done one of two ways depending on your tools and your preference. Sprinkle a baking sheet with flour and set it close to your work space. Sprinkle your hands and work surface with a little flour.

1) Put dough into a disposable piping bag with 5/8th inch tip (or whatever size that you have or prefer). Pipe out half inch pieces of dough and cut at the top with a sharp knife. To make grooved gnocchi, roll the "Pillow" against the back of a fork with your thumb. Place on a floured surface until all gnocchi are formed.

2) Break off a tennis-ball sized piece of the dough and roll it into a thick log about 3/4-inch thick. Cut the log into 3/4" pieces. Shape them by rolling the "pillows" off the back of a fork with your thumb.
Transfer this batch to the baking sheet and toss with flour to prevent sticking. Repeat rolling process with the remaining dough.

Cooking
Bring salted water to a rolling boil. Gently drop the gnocchi into the boiling water - they will sink to the bottom. Once they bob to the surface, they are cooked. Remove gnocchi with a slotted spoon and transfer to a colander set over a bowl to finish draining. Repeat with second batch of gnocchi. Toss the gnocchi with sauce and serve immediately.

The Whole Dish - The Sauce from last night was a creamy pesto because I had leftover basil pesto and it is well...divine.
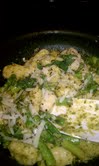
  • 3 cups Ricotta Gnocchi
  • 3/4 pound Fresh asparagus, steamed to slightly undercooked and cut into one inch pieces
  • Handful of Shaved Parmesan Cheese
  • Handful of torn basil (optional)
  • 1/3 cup Basil Pesto (more to taste or quantity available)
  • 2-3 tbsp cream, whole milk or half and half
  • Fresh ground black pepper to taste 
In a large skillet, combine cream, pesto, asparagus, and fresh pepper (if you have minced garlic or shallot you need to use throw it in but it is not necessary) and bring to a simmer for about 5 minutes. Gently toss the gnocchi with the sauce, coating well. Remove from heart. Garnish with Cheese, basil, and pepper to taste and serve immediately. 


* You can freeze leftover gnocchi for up to a month. Frozen gnocchi can be dropped directly into boiling water for an easy weeknight meal.
**There are so many variations for this dish that I cannot list them. I plan on making different types of gnocchi and experimenting with different sauces and veggies! Will post those as I make them.

Monday, March 28, 2011

Bruschetta

Bruschetta makes me so wonderfully happy! It is one of those super simple meals that great ingredients just make amazing. I love making a big batch of this to use as appetizers, chicken toppers, pasta mix-ins and a healthy snack with pita chips. It is awesome for lake weekends and large groups. I like it cold and warmed up - will provide both methods below.

Cold Bruschetta
  • 1.5 pounds ripe, plum tomatoes - drained, seeded, chopped *some people remove skins - I skip this step
  • 4-7 garlic cloves, minced
  • 2 cups julienned basil
  • .5 - 1 tbsp good quality balsamic vinaigrette to taste
  • Salt to taste
  • Freshly ground black pepper
  • A small dash of Gerrard's Champagne Light Dressing *optional
  • One french baguette or ciabatta loaf (I prefer ciabatta but the baguette is much easier to make appetizer portions with 
  • High quality olive oil
In a large bowl combine all ingredients and mix well, adjusting amounts to taste. Set aside.

Slice bread into slices (between a centimeter and half inch thick depending on preference), brush with olive oil and place on a greased baking dish. Bake on 450 for 5 minutes (longer if more doneness is desired, shorter if using smaller slices than half-inch). Remove and top with tomato mixture. Serve immediately.

Warm Bruschetta
  • All the same ingredients, plus Fresh Mozzarella or Burrata, diced
In a large bowl combine all ingredients, plus mozzarella, and mix well, adjusting amounts to taste. Set aside.

Slice bread into slices (half inch thick depending on preference), brush with olive oil and place on a greased baking dish. Bake on 450 for 3 minutes. Remove, top with the tomato mixture and return to the oven for 3-4 minutes - until cheese is melty. Serve immediately.

Stuffed Swiss Chard

One of my favorite sides. Really this can be eaten as a whole meal if you so desire. Healthy and satisfying!
  • One bunch Rainbow Swiss Chard
  • One bunch Green Onions, chopped
  • 1/2 pint cherry or grape tomatoes, whole
  • 4 garlic cloves, minced
  • 1-2 large shallots, diced
  • 1/2 cup shredded mozzarella (or fresh balls) 
  • Salt
  • Pepper
  • Olive oil 
Preheat oven to 350. Steam the Chard in a large pot. Remove after Chard has become wilted, lay individual pieces out flat on a greased cookie sheet (I like to double them up to prevent tearing). Salt and pepper the inside of each chard piece.

In a small bowl, combine garlic, shallot, green onions, pepper, cheese, and tomatoes and mix well. Place a small amount of the mixture in the middle of each Swiss chard leaf then roll to create a packet. Seal with a toothpick if necessary. Brush the top of the chard packets with a bit of olive oil and sprinkle them with salt and pepper. Bake for about 14 - 20 minutes.

Monday, March 21, 2011

Scalloped Potatoes - Twice - Yikes

Friday night. I have the flu. D and I go to my mom's house so that she can take care of me and the boys can have man time with horseshoes. Mom tells me that she is making one of my favorite English meals - Bubbles and Squeak. 30 minutes later a phone call delivers the horrifying news that corned beef has been recalled and is incredibly hard to find in America (and that if it is found, we may contract some disease). Well crud! That was literally the only thing I wanted in the world. Plan B was pieced together from what she had already bought at the store preparing for Bubble and Squeak and their dinner the next night - steaks. Daddy was thrilled because he loves steak and potatoes. My Heart was broken. Somehow this whole "Andi is sick and needs to lay down and be taken care of" turned into Dalt and Daddy pleading with me to make scalloped potatoes and me scrounging through my parents pantry and fridge to acquiesce. Then, the very next day, D and I decided to stay the night again and I had to make an additional dish for me (I do not eat pork and that was on the menu for the evening) so we ended up at the Super S - which was like  a culture shock for me - and the pasta I was making turned into Dalton saying, " You know if you wanted to make scalloped potatoes again, I would eat them." So, for the second time in two days, I made scalloped potatoes - these were different than the night before, I have included both recipes. D was so excited about his leftover potatoes - Daddy only had me leave him enough for one small lunch serving so the rest went into a Ziploc for D. Alas, they were left behind (and yes this means that I have to make scalloped potatoes again in the near future to make up for it - those are going to have oven-baked onion rings on them).

Friday Night
  • Chicken Broth
  • 4 red potatoes - sliced up to a quarter inch thick
  • Mozzarella, Shredded
  • Cheddar Cheese (aged 2 years or more). shredded
  • Monterrey Jack, Shredded
  • Sherry
  • Shallots
  • Onions
  • Garlic
  • Cayenne Pepper, Paprika, Thyme - to taste
  • Butter
  • Flour
  • 2 percent milk, Half and Half, or Cream
  • Mushrooms
  • Bacon Bits
In a stock pot, bring water to a boil (I like to use a bit of better than broth bouillon for extra flavor). Once a rolling boil has been achieved, add sliced potatoes and boil under fork tender. Strain and return to pot. 

Melt butter, Saute garlic and minced shallots with flour and crushed red pepper. Once a light roux is formed, add sherry and cook until alcohol is just cooked out. Add a bit of broth and the milk and allow to thicken. Season with desired amounts of cayenne, salt, pepper, and the thyme. Add in cheeses a handful at a time allowing time for the cheese to melt into the mixture. Keep on low heat.

In another saute pan, heat butter or oil and then add mushrooms and sliced onions. Cook until glassy.

In a buttered, oven-safe dish begin to place one potato round down to cover bottom of pan. Spoon some of the cheese mixture over the bottom layer and spread to cover well. Add sauteed mushrooms, onions, and some bacon bits on top, then repeat this process (potatoes, cheese mixture, mushroom mixture) until the potatoes are gone and the layers are complete. Top the top layer with some shredded cheese and sprinkle with paprika.

Bake in the oven on 350 until bubbly and brown on top. I like to add a little bit of chicken broth around the sides to just keep the dish moist. Top with green onions (if you have - which I did not this night) after removal from the oven.

Saturday Night

It is a little interesting that one sauce seems more authentic than the other. This one uses a can of cheddar cheese soup and some freshly shredded cheddar cheese (I did not have either the night before) in addition to the ingredients from the first night. I also used Green Onions. I omitted as many mushrooms because I needed to save some for my dad for breakfast the next day.

To make this version, follow previous instruction adding the cheddar cheese soup to the cheese/milk mixture. Chop green onions and sprinkle in layers along with bacon, onion, and mushroom mixture. Everything else is fairly similar. In this version you can reduce the amount of flour that you use because the soup will thicken it.

Monday, February 21, 2011

Black Bean Corn Salsa

This is a fairly versatile dip. You can add this to seven layer bean dip, use as a regular dip along side salsa, queso or guac, add it into tacos or enchiladas, etc. When I make enchiladas I serve them with a huge helping of this on the side - I am not sure why I do not put it inside the actual enchilada as it inevitably gets mixed in and eaten with the enchilada. I suppose it is enchilada nostalgia. If you want to make shrimp enchiladas leave out the black beans and tomatoes. This is also the ONLY thing that I will eat bell pepper in. All of the ingredients listed below should be added in quantities according to taste preferences.

Black Bean Corn Salsa

  • Black Beans
  • Red onion - small dice
  • minced garlic formed into paste (no more than 2 cloves is necessary)
  • Red Bell Pepper - small dice
  • Sweet Corn
  • Tomato - seeded, juiced, and diced
  • Lime Juice
  • Avocado
  • Red wine vinegar
  • Spices: powdered garlic, cumin, cayenne, adobo, salt 
  • Cilantro

Combine all ingredients in a bowl and mix well. Add seasoning as desired.

Brilliantly Garlicy Guac

I love making guacamole. I really do not like buying it pre-made because it just does not compare to homemade guac. And it is really easy. The name is inspired by my Sarah after I made semi-homemade guac (in the interest of time and money) to compliment my enchilada calzone creation. Note - if you do choose to buy guac buy Central Market pre-made guac in the chef-prepared bar and then add tomatoes, cilantro, jalapeno, and garlic to it -- see why it is almost easier to make it yourself?


The following recipe should feed about six people
  • 5 Large Hass Avocados- halved, cut into four sections, removed from skin with pit reserved
  • 6 cloves garlic - minced (see instructions below)
  • 2 jalapenos, seeded and finely chopped
  • 1 white or red onion - fine dice
  • 1-2 tomatoes (dependent on taste preferences and size of tomato), seeded and juices drained
  • ONe bunch ciltrano chopped (try to avoid stems)
  • Pinch of adobo spice (optional)
  • Pinch of garlic salt (optional)
  • Pinch of Salt - to taste
  • Black Pepper - to taste
  • Lime juice - squeeze from a half lime (to taste with lemon)
  • lemon juice - squeeze from a half lemon (to taste with lime)
Put minced garlic on a cutting board, sprinkle with a half tablespoon of Kosher salt, mash with a knife running the knife over garlic, then repeating. This will eventually form a loose paste of garlic. Add to bowl.

Combine garlic, avocados, jalapenos, tomatoes, cilantro, and onion in a large bowl. Mash with a potato masher (or large spoon). Once you have acquired the desired consistency (I like mine to have lumps of intact avocado in it but you can make it as smooth as you like - just keep mashing and occasionally stirring), sprinkle mixture with salt, pepper, adobo, garlic salt if using, and squeeze the citrus to taste. Stir mixture to incorporate the additional seasonings. Place pits in the guac to keep it green (can be removed during serving if you like).

Sunday, February 13, 2011

Momma Joy's Quiche

So I have never made a quiche, but my Auntie Joy - who is an amazing cook - made quiches over Christmas that D loved. She was nice enough to share it with me and this morning I thought I would try my hand at it because I wanted to feed six people and it seemed like an easy, satisfying, and cost effective solution. Everyone seemed pleased with it=) I cannot eat eggs so of course could not participate. I made a couple of changes  - I used mozzarella cheese because I did not have gruyere. I also considered adding bacon, but ultimately did not feel like frying it. Additionally, I omitted the butter and used 1/3 whole milk and 3/4 cream because I had some whole milk that I needed to use up.

Makes 2 quiches
  • Tbs. butter 
  • 2 Tbs. olive oil 
  • 5 large mushrooms - sliced
  • 4-5 large sliced shallots 
  • 1 bag baby spinach 
  • 2 Tbs. sherry
  • Sliced mozzarella, jack, gruyere, brie, fontina or cheddar 
  • 10 large eggs 
  • 1 cup whipping cream 
  • 1 pkg. Pillsbury ready made pie crusts 
Pre-bake pie crusts per package instructions (you will need to bring them to room temperature, pre-bake, then cool before using).

Heat oil and butter (if using) on medium heat. Saute properly seasoned shallots in a large saute pan (or  your favourite cast iron skillet) until glassy, add mushrooms. Saute the mushrooms, but do not overcook them. Add spinach and cook until just wilted. Drain excess moisture. Add sherry to the pan and heat to just cook off alcohol.
    In a large bowl, beat together eggs and cream (or milk is using). Add salt and pepper.

    Once pie crust has cooled, layer slices of cheese in the bottom of the pastry, overlapping. Divide spinach mixture between the two and our the egg mixture over the tops.

    Bake uncovered at 375 for about 35-40 minutes. Use a toothpick to check the center for doneness. 

    Let cool before serving. Can easily be served with a nice green salad for brunch.